One of the parts called for is a nicely sized SD card. 2 GB or greater in size is best. In my list, I called for 8GB because that gives you plenty of room to do other things if you want to. SD cards fit into cameras and other consumer type devices. There are slots for them in most computers and laptops. By design, there is an SD card slot for your Rasberry Pi.
In the next installment, you will boot the Rasberry Pi with the SD card in that slot. But for today, we're going to work with it in your computer. We will download a copy of the operating system, then we will unzip it from the zip file it came in. The final step is to write that operating system to the SD card. Let us begin, shall we?
The backup server I'm running is based on a version of Linux called Debian. Debian is the grandaddy of many derivatives, including Ubuntu and Mint, two of the most famous distributions based on Debian. So if you're using Debian or Mint, you may already be familiar with Debian. For the Rasberry Pi, the operating system is called "Rasbian". That's what we're going to download.
Rasbian is easy to get from the Rasberry Pi Download page. Just click on that there link, scroll down some and, behold, the Rasbian image.
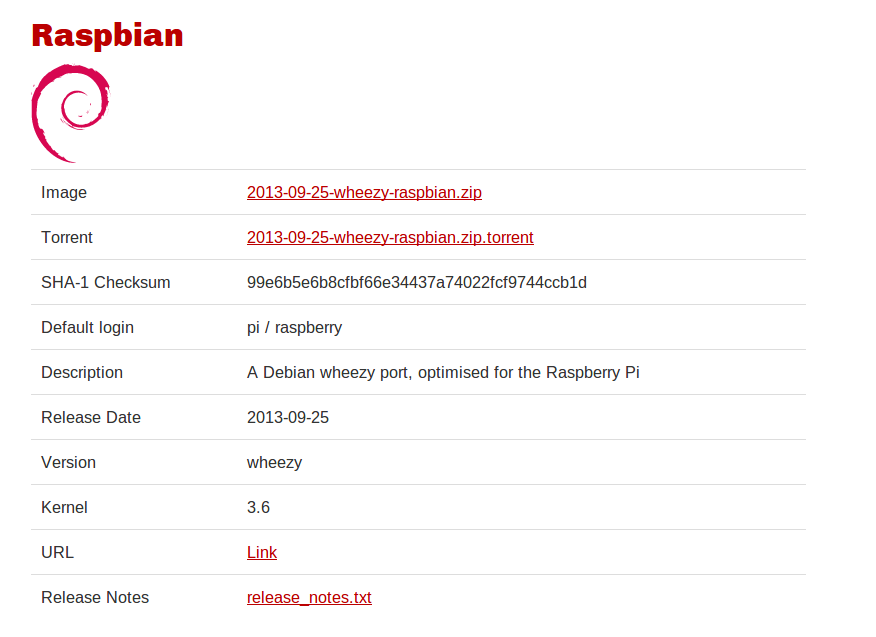
Click on the link on the line starting with the word, "Image". The image you need will be in a zip file. When you click on the link, the download starts right away, and when it's done, you will find the zip file in the download folder. At 577 MB, it's a pretty hefty file, so you'll be waiting 10-15 minutes or more, depending on your download speed.
Once you have it downloaded, you'll find it in the Downloads folder. You can unzip it there, but you may want to move the image to a purpose built directory. I keep a directory called ISOs just for this purpose. From here, we're going to do our work in the command line. I like the command line because it's a lot easier to see what is happening, and some of the commands we're going to use, we can't use with Nautilus (like Windows Explorer, but for Linux).
So open a terminal. Once the terminal is open, assuming that you've downloaded the file to your Downloads folder:
cd ~/Downloads
The above command will navigate to your Download directory.
ls -al *.zip
The above command will list all the zip files in your Download directory, you want to make sure that the Rasbian image zip file is there.
Now we will unzip it:

Once the file has been unzipped, you're ready for the next step, copying the image to your SD card. This can be tricky, and if you're not careful, you can cause serious damage to your Linux computer. Linux is fast, flexible and fascinating to use. But it doesn't give you warnings like Windows does. If you're going to delete a file on the command line, once it's gone, it's gone. You don't get it back. By the same token, if you make a mistake in the following section, you can overwrite your operating system on your main hard drive.
Follow these instructions carefully and you'll be fine.
It's time to insert the SD card into your computer's SD card slot. When you do, you may be prompted to open it with Nautilus or "Files". Maybe not. To see if the SD card is recognized, enter the following command:
ls -al /dev/sd*

That ls command will list all SATA drives known to your system and your SD card is treated as a SATA drive, so it is listed with that command. Here is what is important to know at this point: see /dev/sda? That is your main hard drive. You do not want to mess with that drive, because if you do, you're going get busy with another project: rebuilding your operating system. No, we're only going to be concerned with drives other than sda. This exercise assumes that you have no other drives installed or connected to your computer besides the disk with the operating system and the SD card.
In the above example, the SD card is sdd. Linux uses drive letters, but not like Windows. "sdd" is the hardware, drive d. sdd1 and sdd2 are the partitions on the drive. The other drives listed are empty because there is no number following the drive letter. The SD card may show up as a different letter on your system, so make note of it because you will need it later.
We can find out if the SD card is mounted, too. Enter the command, mount and all mounted partitions will be listed:

The mount command will list all of the mounted partitions. Looking at the list above, there are three really important lines. The line beginning with /dev/sda1 is mounted on / or "root". When we copy the image we downloaded, we will NOT be copying it to that drive. The other important lines start with /dev/sdd1 and /dev/sdd2. That's our target device, that's where we're going to copy the image. None of the other lines are of interest to us at all in this exercise.
Now we know where we are and where we want to go. We're going to copy the image file, "2013-09-25-wheezy-rasbian.img" to the drive known as "sdd". As long as we're clear on that, there will be no problems.
It it time to copy the image onto the SD card. First, to avoid problems, we're going to unmount the SD card. Unmounting an SD card is not to pull it out of the slot. Unmounting is a way of telling the operating system to wrap up all file operations on the card and to close the card. Once closed, it is removed from the list of available file systems kept by the operating system.
So while the command "mount" can be used to add new file systems, "umount" is used to remove them. In the picture below, see the results of umount /dev/sdd*, which removes /dev/sdd1 and 2 from the device list.

Now that sdd is unmounted, it is ready for a fresh copy of Rasbian to be laid onto it. The image we want to use has been unzipped and is ready in the downloads folder. We're going to use a new command, "dd". dd is a command for copying data bit for bit, from one device to another, or from one file to a device and vice versa. Here, we're going to copy the image to the SD card:

The command above can be broken down as follows:
sudo is to use root privileges.
dd is the data copy command.
bs=4M is the block size for the device. You need to include this option for the image to work when you are ready to boot it on the Rasberry Pi.
if=2013-09-25-wheezy-rasbian.img is the input file. dd takes and input file, like a device or a file on the disk, and copies it where you want it to to go.
of=/dev/sdd is the output file, or destination. This is one of the things that I find so interesting about Linux. *Everything* is a file. It's hard to explain, but it's a very cool feature.
This takes awhile and there is no progress indicator. You could find a way to monitor the progress, and I've looked, but they're all really complicated, even for me. So we'll let this run. In the next installment, we'll see it how it looks from the command line after the image is complete. We will also boot this image for the first time on the Rasberry Pi and go over what to do on the first boot.
If you have any questions about this post, please contact me by email or reply. I'm happy to help out.
No comments:
Post a Comment